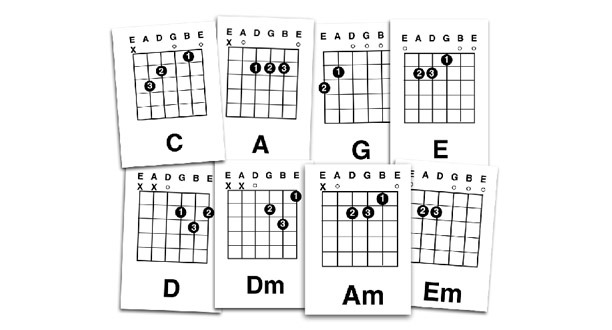
Strumming patterns breathe life into your chord progressions. You can write a great song from a tonal perspective, blending majors and minors with moments of tension and release, but with a drab strumming pattern it will sound flat and uninteresting.
To understand strumming patterns, you need a basic grasp of how time works in music, and it takes a bit of practice to keep your patterns consistent. It’s worth investing the time though, because when you master strumming you can shift genres at will and come up with countless ways of playing any song.
The Theory
You don’t need to understand much about music theory to be able to play strumming patterns. Music is broken up into bars, and each bar is subdivided into beats. Time signatures indicate how many beats fit into a bar and how long they are, and they’re displayed as a fraction-like value. 4/4 is known as “common” time, and it is the most widely used. The lower number tells you what type of note constitutes one beat, and the upper number tells you how many of them fit into a bar.
The lower “4” tells you that a beat is the length of a quarter note. In simple terms, a quarter note lasts a quarter of the time a whole note does, and twice as long as an eighth note. This means that in a bar of 4/4, you can fit eight eighth notes. Seen as a chord is just several notes played together, that means you can fit eight strums around the four beats. Half of the strums fall on the quarter-note beat and half on the off-beat. In the same way, you can fit four quarter note strums (on the beats) or sixteen sixteenth note strums (with mainly off-beats) in if you like.
There are other time signatures too, but they’re much less common. 3/4 is a waltz, an “oom pah pah, oom pah pah” rhythm, consisting of three evenly-spaced quarter-notes. In the same way as with 4/4 time, you can fit twice as many eighth notes into the same bar. 2/4 is another common time signature, and there are also more complex ones such as 5/4 or 9/8.
How the Theory Helps Your Strumming
The basics of time signatures basically tell you how many strums you can fit into each bar and which ones you should emphasize to convey the beat. Count out loud, “one and two and three and four and,” maintaining a steady rhythm. The numbers represent the beats and the “ands” are the off-beats. If you strum a chord four times – on the beats – you get a solid (if a little boring) sense of the rhythm of the music. Strum on the beats and the off-beats to pick up the pace using eighth notes. The quarter note beats contain the rhythm, so if you strum a little harder for them (“accent” them) then the beat is still distinct. You can do the same thing to turn the strumming into sixteenth notes and still protect the core rhythm. If you’re strumming in quarter notes, try only accenting the first beat, or the first and the third.
Practical Considerations
There are a couple of things you need to know to start learning strumming patterns. Firstly, and most importantly, you have to strum on the down-stroke (away from you) and the up-stroke (towards you) when you’re playing strumming patterns. This is pretty easy, but it’s essential for keeping time. No matter how many strums are missed out of the pattern, you should keep your strumming hand moving as if you were still playing. Just miss the strings on purpose when you don’t want to strum. It might seem a bit ridiculous, but it helps you keep the rhythm.
The actual length of time a whole note represents is shown by the tempo of the song, which is expressed as beats per minute (BPM). You can practice along with a metronome if you want to play any examples you find at a specific tempo. Metronomes give you a series of clicks, each of which represents a quarter note beat.
Strumming patterns are often shown through a simple representation of the beats in a bar “1 & 2 & 3 & 4 &” with either “\/” or “/\” arrows underneath. These tell you when you need to strum and what direction you should be strumming in. If you ever have to count sixteenth notes, say “one-e-and-a two-e-and-a” and so on. Accented notes are usually shown with a “>” arrow.
Example Strumming Patterns
These example strumming patterns are shown in the same way, but they don’t have accents. You can generally stick to accenting the beats, or experiment a little to see what other effects you can create. Go at whatever tempo you’re comfortable with – you can speed up when you get used to them.
Start by removing a single strum from a basic eighth note pattern. Remember to count out loud and keep your strumming hand moving to help yourself stay in time.

Now take another strum away to make it even more interesting.

Try this strumming pattern on the off-beat. This is common in reggae and ska. You can add a down-stroke on the fourth beat if you want.

You can also create interesting sounds by putting together groups of three strums in 4/4 time.

Build in some sixteenth notes to pick up the pace even more.

These should give you enough ideas to create plenty of strumming patterns of your own. It’s easy, just experiment with skipping different beats, plotting your strums anywhere you like within the bar. You can even play most of the bar as eighth notes and build in sixteenth notes for the end of the bar. Remember to experiment with accenting, and you can also incorporate “dead” strums or pick the root note of the chord (C in a C chord, D in a D chord, e.t.c.) on the first beat to make things more interesting.


Add comment